This post explains:
- How to use custom subdomain to call the backend service deployed on AWS
- How to use HTTPs over the same.
How to use custom domain to call the backend service deployed on AWS 🔗
Generally, when we deploy any client-server based service, we deploy it behind load balancer. The load balancer created has a custom DNS name via which we invoke the service - something like ecomm-web-8JDRY7KQF6UQ-120268907.us-east-1.elb.amazonaws.com. We want to use a custom domain to invoke this service. The DNS configuration of this domain is controlled via 3rd party provider like namecheap, godaddy, etc.
In this scenario, we need to go to Advanced Configuration within DNS provider’s website and add a DNS entry which would direct the subdomain specific request to the load balancer. More specificially, we need to add a CNAME entry. The example configuration would be like:
CNAME | api | ecomm-web-8JDRY7KQF6UQ-120268907.us-east-1.elb.amazonaws.com
Meaning of the above line:
If the domain purchased is ecomm.in, then the above configuration implies that whenever api.encomm.in is invoked, the request is internally routed to ecomm-web-8JDRY7KQF6UQ-120268907.us-east-1.elb.amazonaws.com. This means that if your service has the route /health then after adding the above configuration, you can access the url via http://api.ecomm.in/health.
How to use HTTPs over the same 🔗
In today’s time, using HTTPs is the defacto standard, following by all the websites on the internet. Even the browsers enforce the same to be present. Therefore it is important that the domain that you have defined earlier serves request over HTTPs.
Using HTTPs refers to the connection between the client and server being encrypted. An HTTPs connection is determined by use of SSL/TLS certificate which is used to identify the provider or owner of the service. The service provider in our case is AWS load balancer and we need to way for it to create a SSL/TLS certificate.
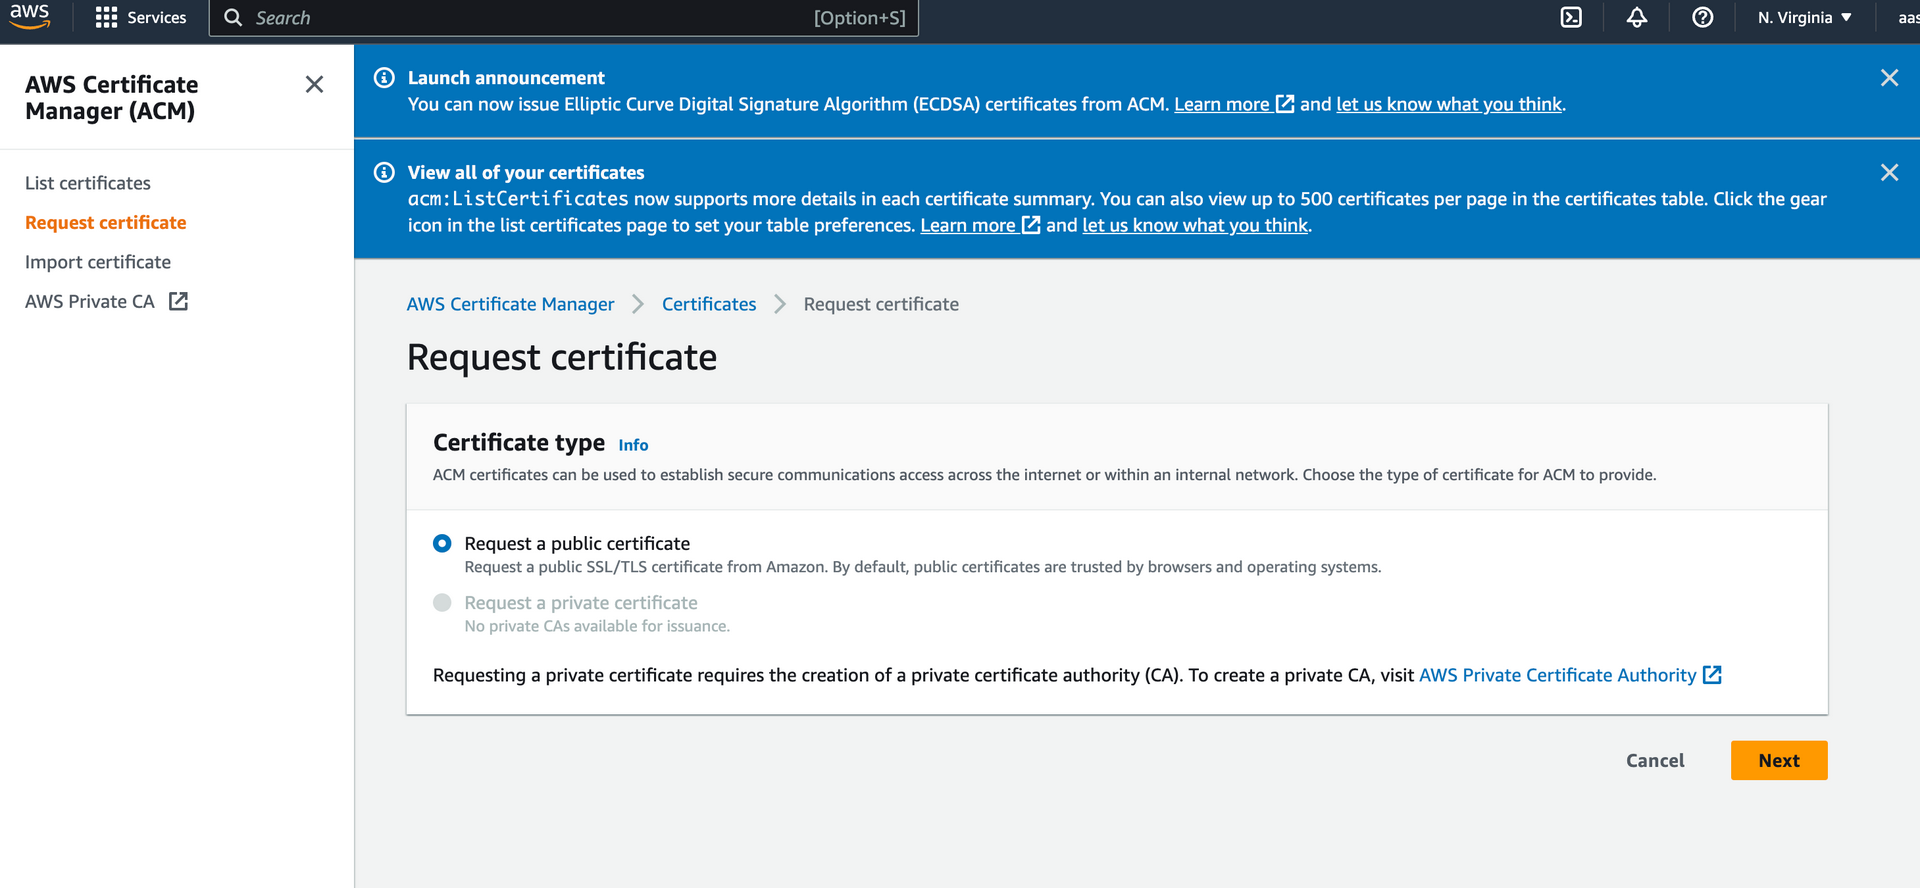
The first step to do in this case is to create a certificate entry in AWS certificate manager:
Step 1:
Step 2:
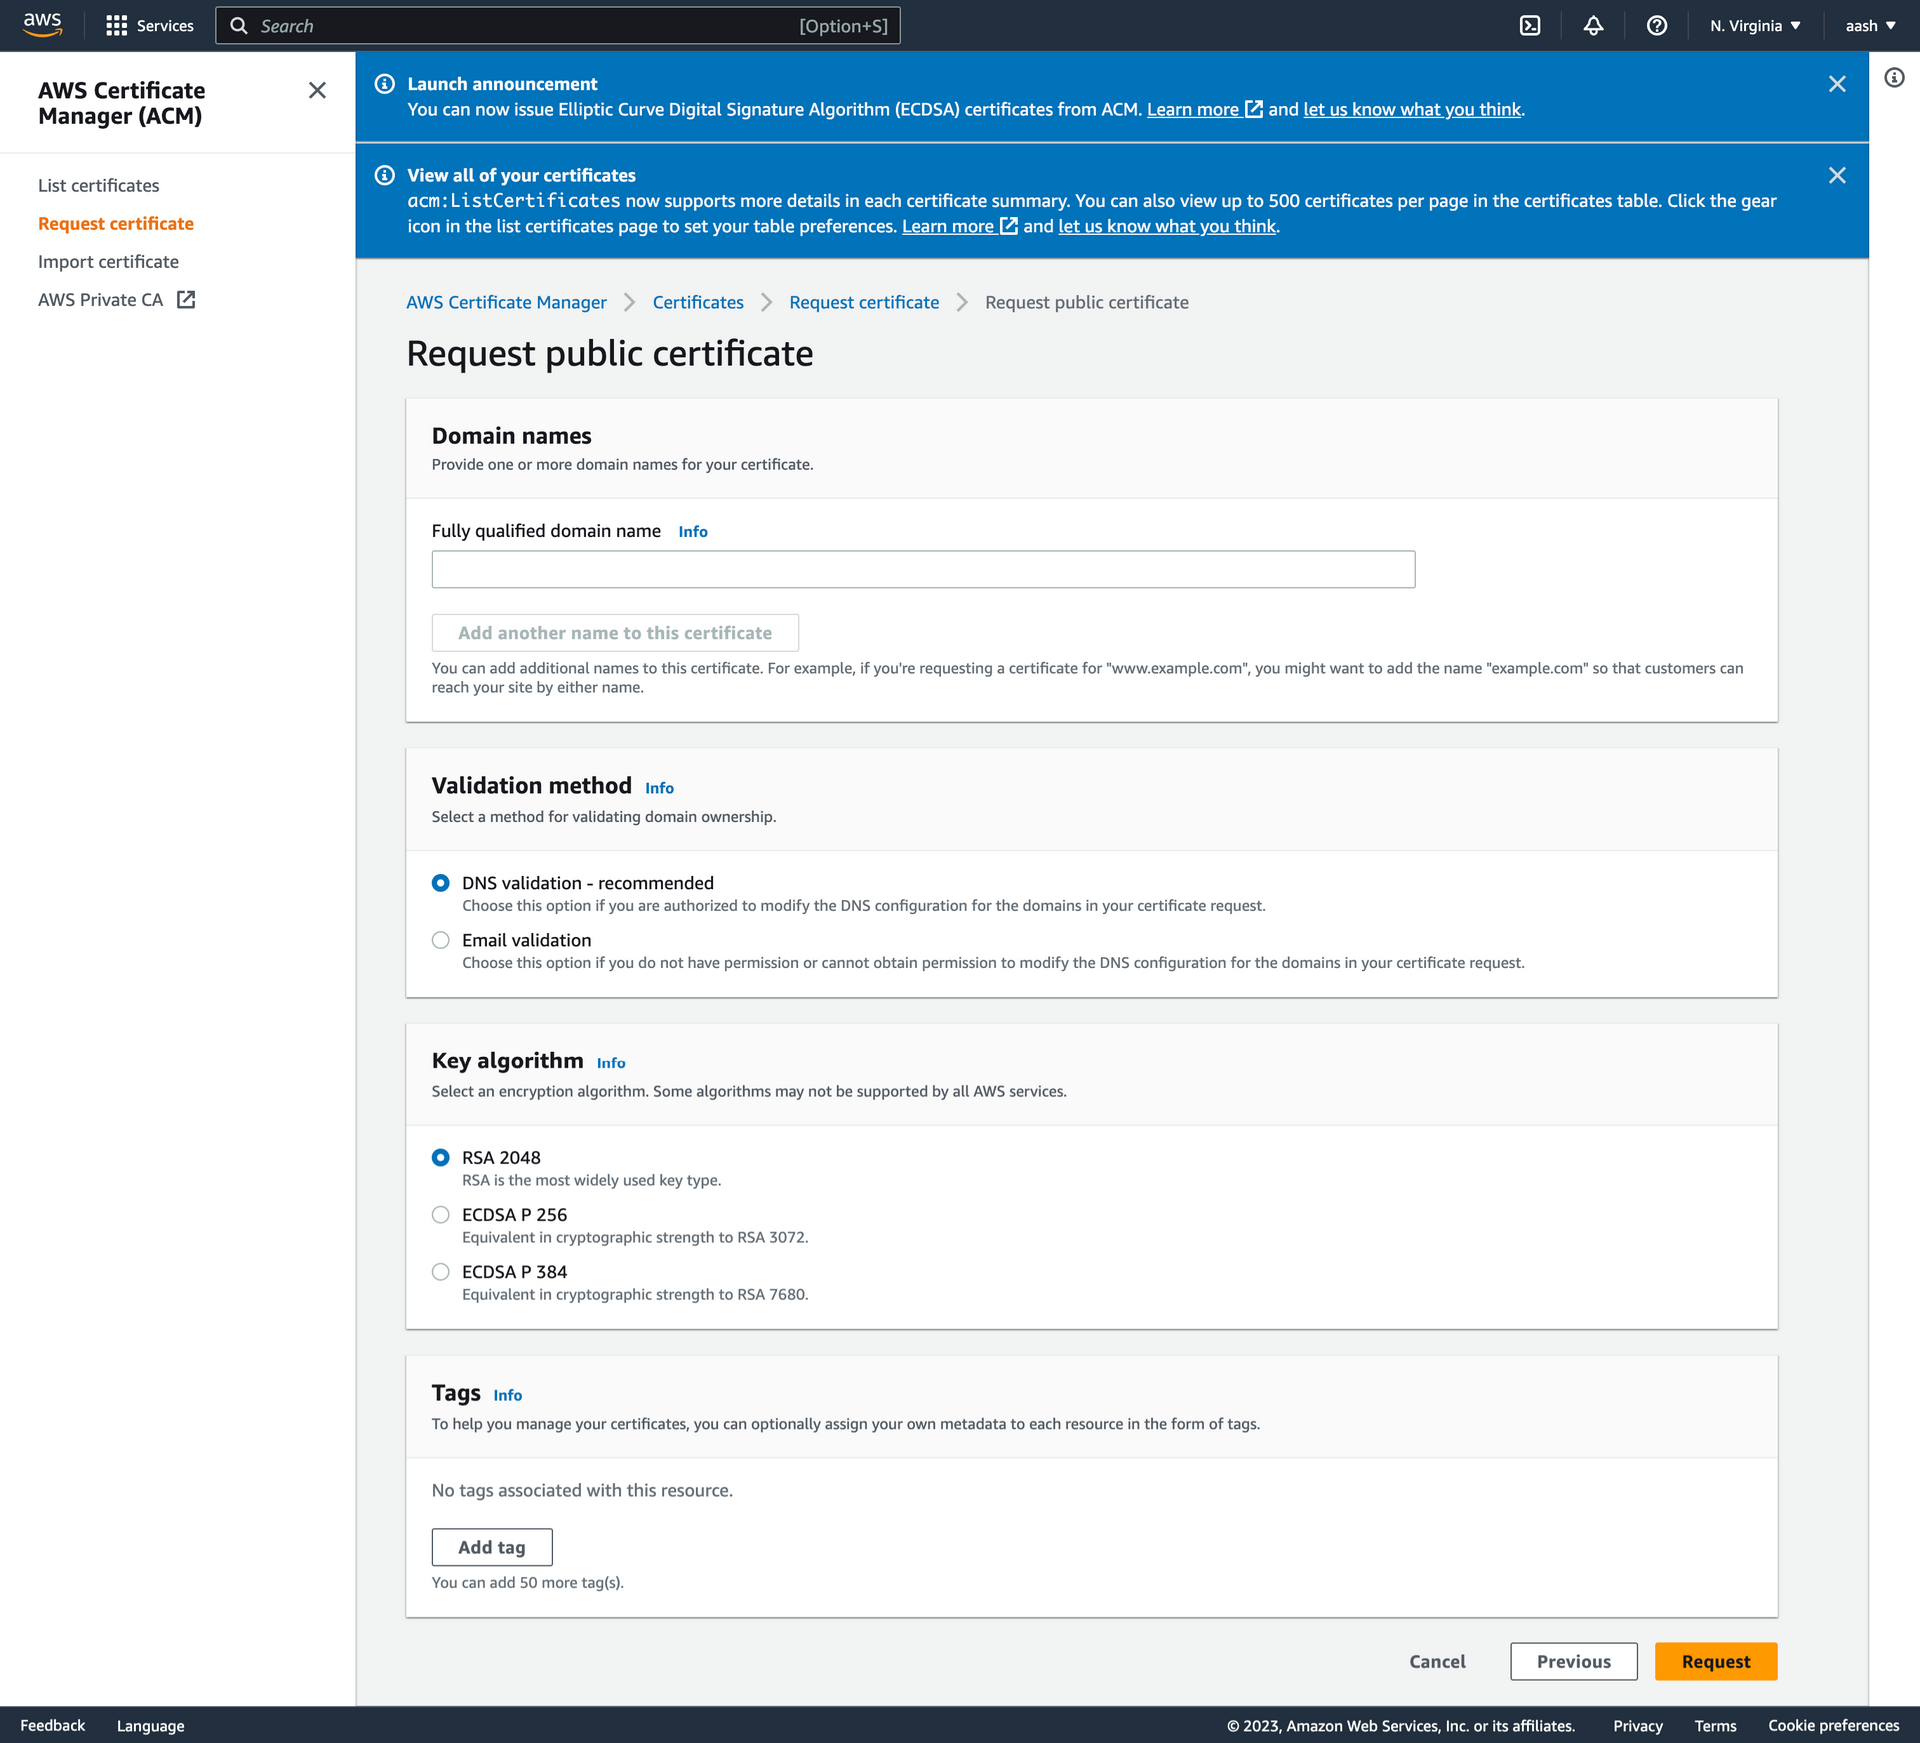
Step 3:
Enter valid domain , select DNS Validation and submit by clicking proceed.
Step 4: Next click on view certificate. You will see this:
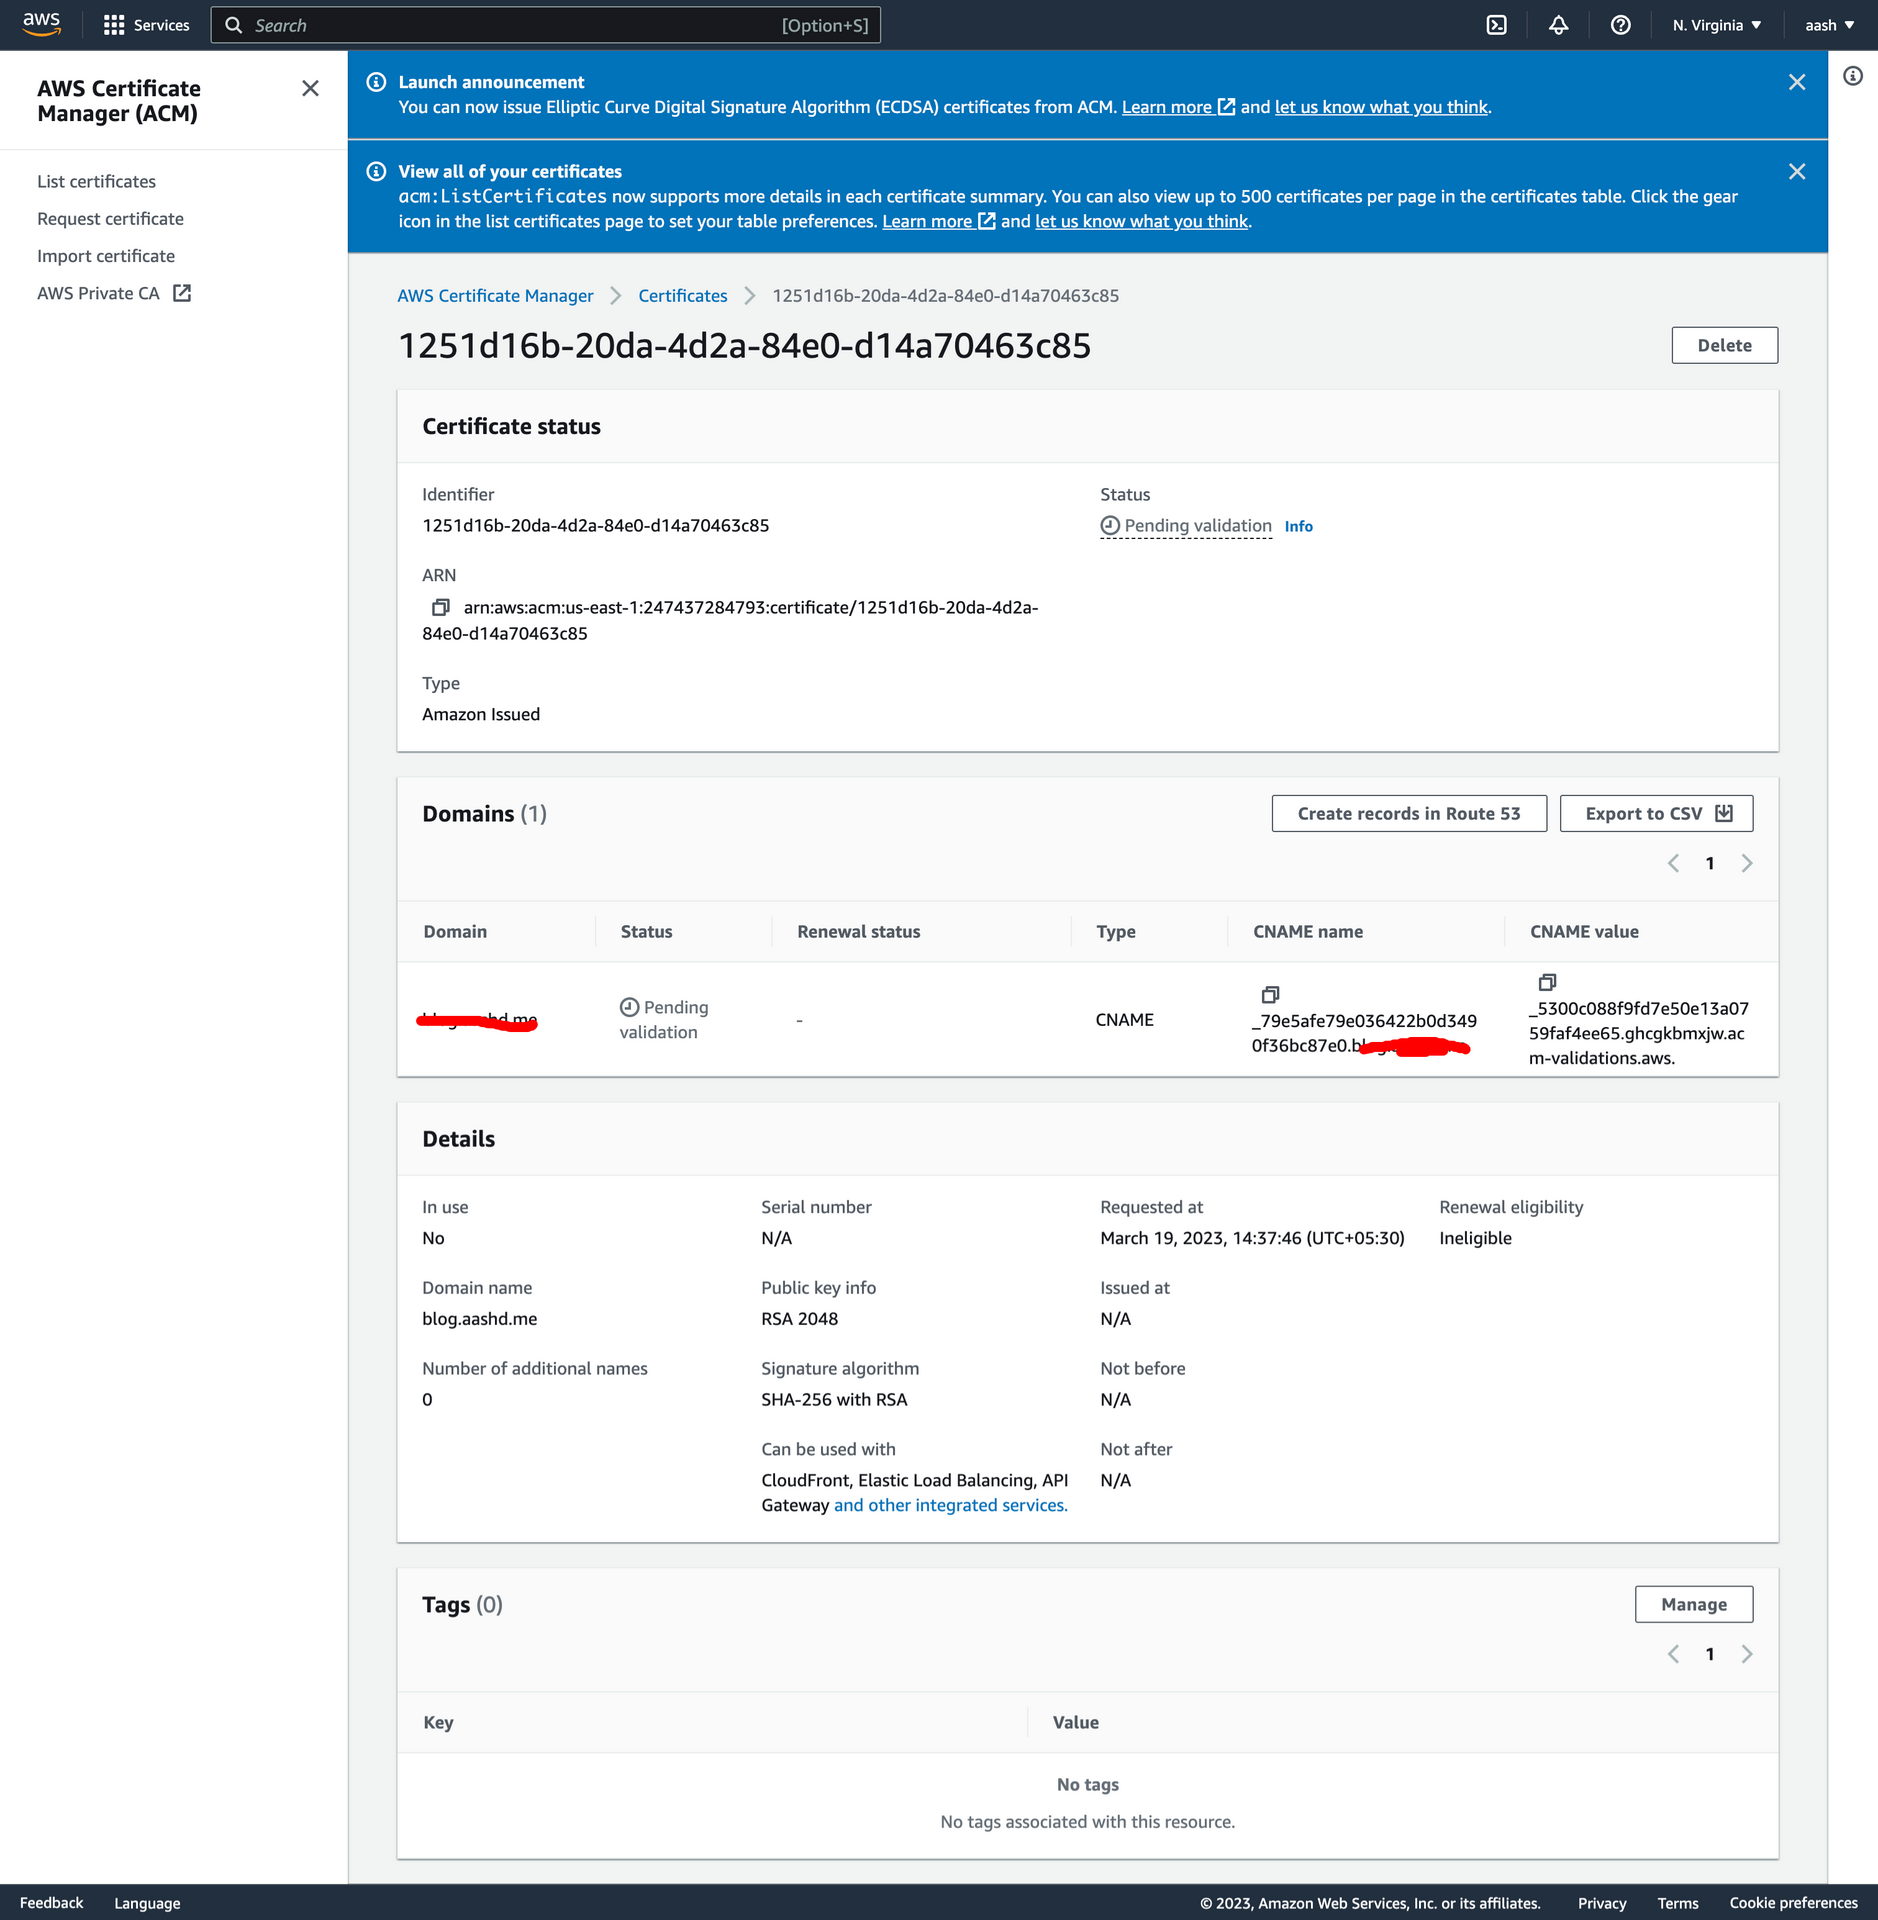
Step 7:
In the Advanced Configuration in your DNS provider’s website, add a new CNAME entry with the the values mentioned above.
Enter the CNAME name in DNS config properly. For example if CNAME name is
_79e5afe79e036422b0d3490f36bc87e0.blog.aashd.me.(This is the case where I want to request certificate forblog.aashd.mesubdomain), while creating the DNS entry use only_79e5afe79e036422b0d3490f36bc87e0.blog. This is automatically handled by few DNS providers, but stripping off the suffix before saving the entry, but in some cases it needs to be taken care of.
Eg:

Step 8:
Once you add the values in the DNS configuration and save, you need to wait a few mins to an hour for those changes to take effect. Once the changes are live, you will be able to see the status as available for that certificate
Step 9:
Once that certificate is added, you need to go to you load balancer config, add a new rule / listeneer for https, add proper routes and use the certificate you create above.
Once the changes are in effect, you will be able to use your service over https.